When I was first introduced to a looper pedal many years ago, I couldn’t see the purpose of them. After all, why would I need a little box that can temporarily record low-fi guitar riffs when I could just use recording software instead?
But, just like many other pieces of digital music technology, the glorious engineers have continued to improve the humble looper into an extremely powerful tool for practice, live use and songwriting.
In this article, I’m going to show what guitar looper pedals do, how to use them and how they differ from recording gear and software (to help you determine if either option is going to help your guitar playing).
The Basics: What a Guitar Looper Pedal Does
A looper pedal records a short phrase of music (a “loop”) and then replays that piece of music on repeat until you stop it.
The really useful part? It records this loop while you’re plugged into your amp, and plays the loop through your amp too.
In the early days, most guitar loopers could only record a very short amount of music, which was great for styles like blues or funk for improvising over, but nowadays some can record 30 minutes or more.
You have a few things you can generally control, depending on the exact model and type of looper pedal you have:
Start recording (often done with a tap of your foot)
Stop the recording (usually starts playback immediately after for a smooth transition)
Overdub (add more layers of guitar to the recording)
Cancel (to stop recording the loop or overdub you’re trying, for when you make a mistake)
Volume control (to determine the volume of the loop compared to your live playing)
Quantisation (if you want the loop length to line up to a pre-determined grid)
Which loop or memory bank you’re using (as many can store multiple loops you can move between)
Delete/Clear the loop (for when you’ve made a mistake or want to start a new loop)
Pause (for when you want to have a break from the loop for a while but still want to come back to it)
So how is it different to a recording system?
A recording system is almost always connected to a computer now and is controlled through keyboard, mouse and various control surfaces.
Every system is different, but in general a recording system can do everything a looper can do and a whole lot more, like:
editing recordings
adding effects to recordings
other instruments
So, why not just use a recording system if it’s more powerful?
It’s a lot harder to use while you play. You can’t (usually) control it with your foot, and they are more complicated to setup and get going.
They require a computer (or phone or tablet), making them much less portable and impractical for most live situations or rehearsals.
They’re almost always more expensive overall.
Check out this guide to recording equipment if you want more details on how they work and what’s involved in setting it up (it’s not super expensive, but it is a bit more involved than a looper).
We’ll compare a guitar looper pedal with a guitar recording system for each of the use cases below to be more specific.
Using the Guitar Looper Pedal for Practice
One of the most common ways to use a looper pedal is to play a vamp (a short chord progression or idea) and to practice improvising (soloing) over the top.
Incredibly useful if you’re a lead player who doesn’t have another guitarist to jam with all the time!
It can also help when you want to listen back to your playing quickly to critique it, as it can be tough to do that really well whilst playing.
You can do the same thing with recording software, but it just requires more equipment and a bit more time.
For most people, I would say the looper pedal is the better option, unless you really love using your recording setup every chance you get.
Using the Guitar Looper Pedal for Songwriting
You can do exactly the same thing for songwriting too - just loop an idea and try some leads or extra parts over the top.
This is great in the early stages of songwriting, but beyond that, I’d recommend using recording software instead, for one simple reason: even though most modern loopers can store loops, it’s often difficult to get that loop off the loop pedal and onto a computer.
That means if you do decide to record the song for real, you’ll have to do it again in a recording system anyway.
Using the Guitar Looper Pedal for Live Performances
Live use of the looper pedal can become an integral part of your live performance - especially if you’re a solo performer. Think about Ed Sheeran, who uses the looper so he has the option of two guitar tracks in his performance despite playing solo most of the time, or a guitar master demonstrating ideas to a live masterclass audience as required.
Whilst it is technically possible to just pre-record backing tracks for a similar effect, there’s two main reasons why you may not want to:
You’re locked into the tempo and feel of the backing track, so you can’t speed up or slow down your performance to match the energy required.
Many people view backing tracks as less “authentic” than a looped recording that they saw you play live. This depends a lot on the genre, as pop, modern R&B, hip-hop and even some forms of rock and metal regularly use samples and backing tracks live by default, but you would rarely see a folk performer or a blues band relying on them.
The looper pedal can basically replace a second guitarist, or it can be used with other musicians to thicken the sound in a particular part. You can even use it for more psychedelic or trance-like repeating ideas, especially in combination with other pedals and effects.
How to Use the Guitar Looper Pedal
Properly playing a looper pedal can take a bit of practice to get right, as it’s all about timing.
First step is to start recording by tapping the button, and immediately play your pattern. Usually this will be a chord progression or a riff.
As soon as the loop is finished (i.e. the end of that bar) you tap to stop the recording and start the playback. If you time it right, it should sound like you just kept the pattern going with no gap.
From there, you can play over the top without touching the looper pedal if you only need two guitar tracks. If you want more layers, on most loopers you can overdub (record and merge) more guitar layers on top to make a thicker sounding loop.
Common Guitar Looping Problems
By far the most common when you’re starting out is making a mistake getting the timing right when you press the footswitch, which usually means you accidentally cut out or add in a beat at the start or the end. This will make your loop sound off, even if your playing was perfect!
To mitigate this problem:
Use small loops of 2-4 bars to start with until you get comfortable
Practice with a metronome to make sure you don’t speed up or slow down as you play
Tap your foot as you play!
The next most common mistake is pressing the wrong button, or accidentally double-tapping, or basically some form of user error when actually trying to operate your looper pedal.
To mitigate this problem:
Get a decent looper pedal that’s easy to use
Practice using it a lot! It’s fine to make mistakes with it at first, but the whole nature of the looper is that mistakes can be quickly corrected.
Choosing a Guitar Looper Pedal or Recording Equipment
Shopping for looper pedals isn’t too difficult so long as you know what you want it to do.
Generally, the differences between models will be:
How many loops you can store at a time (one is simplest, but some can do many more)
Whether loops store when you unplug the pedal or not (very useful if you want to pre-record loops or if you want to jump between loops as you play)
How long the loops run for (may be measured in bars, but most commonly measured in seconds or minutes)
Audio quality (very cheap pedals or old pedals tend to be noticeably weaker sounding)
Controls (screens, knobs, switches and so on. Personal preference on this one!)
Build quality (you’re going to be stomping on it, so most good ones are made out of metal)
Bells and whistles! Things like quantise functions, drum machines, pre-built loops.
If you can, try out different loopers as there are little variations in how the operate.
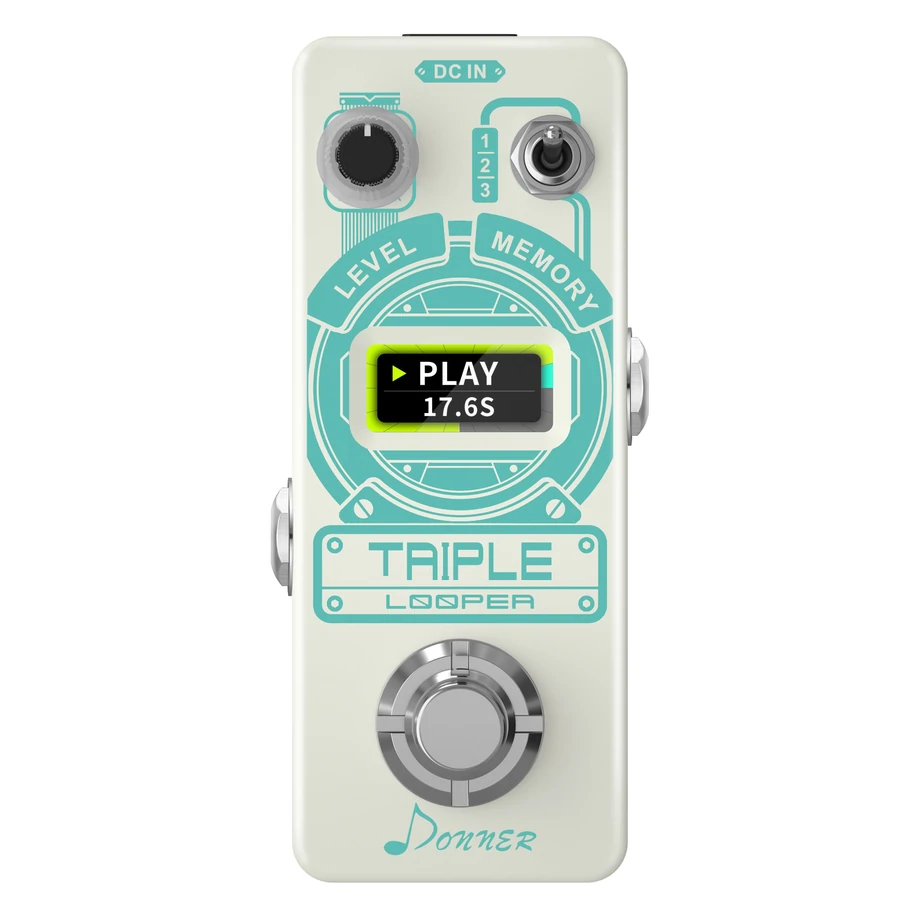
We do have an affiliate deal with Donner music, who make the Triple Looper, which is a great all-rounder (click here if you want to check it out - you can get 15% off if you use our discount code: path15), but as loopers are digital gear, I wouldn’t worry about the brand so much. Instead, look at the features listed above, check reviews for build quality or better yet try some out to see how easy you find it to use.
For recording systems, it’s a bit trickier, as to record electric guitar you would need:
A computer, phone or tablet
Recording Software
A recording interface
We haven’t got any discount links for this sort of equipment sorry, but there is a comprehensive guide here on choosing audio gear to give you the knowledge to get started.
One Alternative - the MultiFX Pedal
There is one alternative tool you can get instead of a dedicated looper pedal: a multiFX pedal with a built in looper!
This is quite handy as you will get a lot of other guitar effects as well as the looper in one package, but has the downside of being more potentially more expensive and more complicated to use.
Not all multiFX pedals have loopers, so just check the included effects for “looper” if you opt to go down this route.
Hopefully you now know enough to go out and try a looper for yourself now, but if in doubt, drop in to your local music store and just ask them to show you how it works. Nothing beats first-hand experience with music technology!


